Forums or message boards have been around as a medium for discussion and posting information since the dawn of the Internet. They usually have a hierarchical organization of forums and sub-forums, each with threads of discussion or topics. Forums typically have "moderators" who interface with users of a forum or sub-forum and "administrators" with privileges to manage the technical details of the site. Forum features include emoticon symbol support, polls, direct forum member communication, display of forum stats, user profiles, media support (videos, images, etc), word censoring, bot detection, etc. One of the favored forum software platforms by both by users and by number of instalations is is PhpBB, an Open Source, PHP based forum that this tutorial seeks to detail its installation and configuration.
Mobile support is now more important than ever and using a "responsive" web design which allows a site to conform to the user platform using CSS crafted to alter the web page based on the platform (desktop, tablet or smart phone). PhpBB supports many themes for various design interfaces and user presentations including one detailed here to support responsive web design.
One of the primary problems encountered in running a web forum is SPAM from those seeking to use your platform for the generation of back-links for SEO purposes. Within hours of installing a forum you will start to get hundreds of SPAM posts. PhpBB has some SPAM mitigation techniques but none is more effective than using a social login where the social platform performs the vetting of users. This tutorial includes details on installing a social plugin which can be configured to use one of many "social logins" including Facebook.
Download PhpBB software from https://www.phpbb.com/downloads/
cd /var/www/html
tar xjf ~/Downloads/phpBB-3.1.9.tar.bz2
sudo chown -R apache.apache phpBB3
# SeLinux settings:
chcon -R -t httpd_sys_content_t /srv/www/html/phpBB3
Extract to a web server accessible area: /var/www/html/phpBB* or use the Apache web server directives to assign your own web accessible directory if you want to use something other than the system default.
PhpBB also requires some supporting Linux packages: GD, zlib, Imagemagick
yum install php-gd
yum install zlib
yum install ImageMagick
Note that AWS EC2 uses the GD package name php56-gd
File: /etc/httpd/conf.d/yourdomain.conf
<VirtualHost *:80>
   ServerName forums.yourdomain.com
   ServerAdmin webmaster1@yourdomain.com
   DocumentRoot /srv/www/html/phpBB3
   ErrorLog /var/log/httpd/yourdomain.com-forum-error_log
   CustomLog /var/log/httpd/yourdomain.com-forum-access_log combined

        <Directory "/">
                Options FollowSymLinks
                AllowOverride None
        </Directory>
        <Directory /srv/www/html/phpBB3>
                AllowOverride None
                Order allow,deny
                Allow from all
                Require all granted
        </Directory>

</VirtualHost>
Restart the web server to pick up your configuration: service httpd restart
MySQL "Safe Mode": If turned on, database connection functions that specify default values will use those values in place of any user-supplied arguments. See http://php.net/sql.safe-mode.
File: /etc/php.ini[SQL] sql.safe_mode = OffRHEL6 with PHP 5.6.21
In MySQL, generate a new database (eg phpbb), generate a new MySQL user for that database:
shell prompt$ mysql -u root -p
mysql> CREATE DATABASE phpbb;
mysql> GRANT ALL PRIVILEGES ON phpbb.* TO phpbb@'localhost' IDENTIFIED BY 'supersecretpassword';
mysql> FLUSH PRIVILEGES;

mysql> SET PASSWORD FOR phpbb@'localhost' = PASSWORD('supersecretpassword');
mysql> FLUSH PRIVILEGES;

mysql> GRANT SELECT,INSERT,UPDATE,DELETE on phpbb.* to phpbb@'localhost' identified by 'phpbb';
mysql> FLUSH PRIVILEGES;

mysql> USE mysql;
mysql> update user set Select_priv='Y',Insert_priv='Y',Update_priv='Y',Delete_priv='Y',Create_priv='Y',Drop_priv='Y',Reload_priv='Y',Shutdown_priv='Y',Process_priv='Y',File_priv='Y',Grant_priv='Y',References_priv='Y',Index_priv='Y',Alter_priv='Y',Create_user_priv='Y',Event_priv='Y',Trigger_priv='Y',Create_tablespace_priv='Y' where User='phpbb';
mysql> update user set Create_routine_priv='Y',Alter_routine_priv='Y',Show_db_priv='Y',Create_tmp_table_priv='Y',Lock_tables_priv='Y',Execute_priv='Y',Repl_slave_priv='Y',Repl_client_priv='Y',Create_view_priv='Y',Show_view_priv='Y' where User='phpbb';
mysql> FLUSH PRIVILEGES;
Test connection:
shell prompt$ mysql -u username -p
mysql> use phpbb;
For more on MySQL use and administration see the YoLinux MySQL tutorial.
The configuration of PhpBB is done using a web browser via the admin interface: http://hostname/install
Installation:- Select "Install" tab
- Select "Proceed to next step"
- If anything is deemed "Unwritable" you must fix this condition before proceeding. See permissions and SeLinux settings above.
- If everything looks copacetic select "Start Install"
- Select "Proceed to next step"
Requirements:
- Check if everything is copacetic and valid
- Select "Start install"
Database Settings:
- Enter database info:
- Database type: MySQL with MySQL Extension
- Database server hostname or DSN: localhost
- Database server port: (leave blank or 3306)
- Database name: phpbb
- Database username: phpbb
- Database password: supersecretpassword
- Prefix for tables in database: (eg. phpbb_) Note that there is a max length total - 30 characters.
- Select "Proceed to next step"
- Database connection:
- This will test your connection. Result: Successful connection
- Select "Proceed to next step"
Administrator details:
- Admin config: Default board language, Administrator username, password (phpbb/supersecretpassword) and email address (dude@mydomain.com)
- Select "Proceed to next step"
- Check administrator settings: Tests passed
- Select "Proceed to next step"
Configuration File:
- The configuration file has been written. You may now proceed to the next step of the installation.
- Select "Proceed to next step"
Advanced Settings: (Next step was to set email and server URL settings. The defaults worked for me except mail server)
- Email settings:
- Enable board-wide emails: enabled
- Use SMTP server for email: yes
- SMTP server address: mail.mydomain.com
- Authentication method for SMTP: Plain
- Server URL settings:
- Server protocol: http://
- Domain name: forums.mydomain.com
- Server port: 80
- Script path: / (default: /phpBB3)
- Select "Proceed to next step"
- Create database tables:
The database tables used by phpBB 3.1 have been created and populated with some initial data. Proceed to the next screen to finish installing phpBB. - Select "Proceed to next step"
Final Stage: Login - You are launched into the admin panel to generate forums, postings, users and groups, ...
After installation you will no longer need the installation directory /srv/www/phpBB/install/: rmdir --ignore-fail-on-non-empty /srv/www/html/phpBB/install/
- Block SPAM:
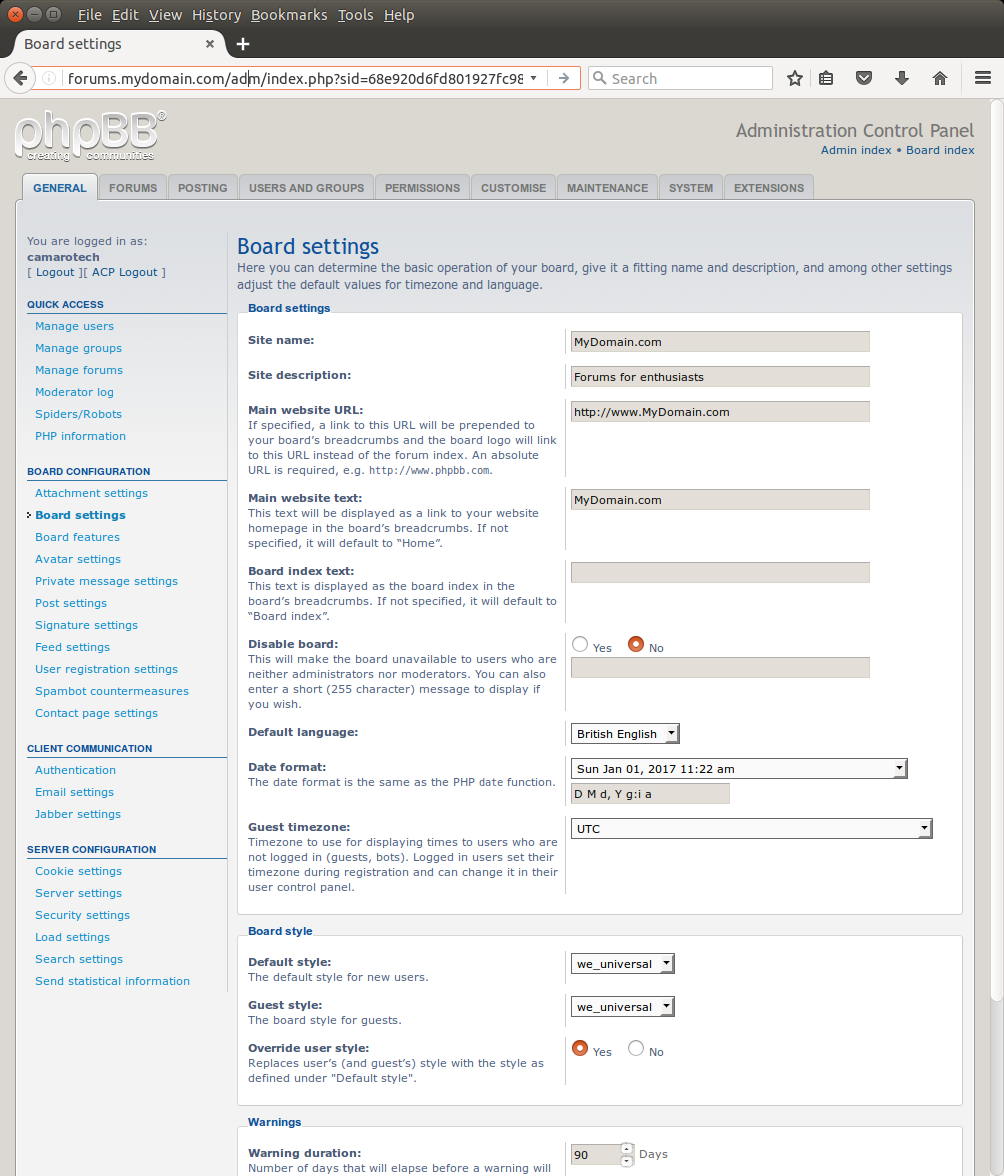
- General Tab + Board Configuration/User registration settings/Account activation: Disable registration
- General + Board Configuration/Board settings + Disable board: yes
- Set Forum URL:
- General + Board Configuration/Board settings + Server URL settings +
- Domain name: mydomain.com
- Site description: Forums for awesome people
- Main website URL: http://www.MyDomain.com
- Main website text: MyDomain.com
- General + Server Configuration/Server settings + Server URL settings (set during install)
- General + Client Communication/Email settings + Contact email address: dude@mydomain.com
+ Return email address: dude@mydomain.com - General + Client Communication/Email settings + SMTP server address: mail.mydomain.com (set during install)
- General + Server Configuration/Cookie settings + Cookie domain: forums.mydomain.com
- General + Board Configuration/Board settings + Server URL settings +
- Security:
- "General" tab + "Server Configuration" + "Security settings":
- Select "Check IP against DNS Blackhole List: Yes
- Select "Session IP validation: All
- "General" tab + "Server Configuration" + "Security settings":
- Configuration:
- General + Board Configuration/Board features + turn off Birthdays (two places)
/Private message settings + turn off "Private messaging" - General + Client Communication/Email settings + Enable board-wide emails: disable
- General + Board Configuration/Board features + turn off Birthdays (two places)
- Enable YouTube:
- Admin (ACP) + Postings tab + Add a new BBCode:
- BBCode usage:
[youtube]{IDENTIFIER}[/youtube] - HTML placement:
<object type="application/x-shockwave-flash" data="http://www.youtube.com/v/{IDENTIFIER}" width="560" height="349"> <param name="movie" value="http://www.youtube.com/v/{IDENTIFIER}"/> <param name="wmode" value="transparent"/> </object> - Help line: Embed YouTube link
- Display on posting page: check
- Submit
- BBCode usage:
- Admin (ACP) + Postings tab + Add a new BBCode:
Customize as you see fit. The above is a general guideline.

There are many styles available to display the color themes and web presentations other than the stock out of the box look. There is one in particular that is noteworthy for its mobile friendly responsive design: "we_universal"
Download: https://www.phpbb.com/customise/db/style/we_universal/
Installation:
- Download: we_universal_2.4.6.zip
- Unzip: unzip we_universal_2.4.6.zip
This generates a sub-directory we_universal/ - mv we_universal/ /srv/www/html/phpBB3/styles/
- chown -R apache.apache /srv/www/html/phpBB3/styles/
- Edit style:
- File: styles/we_universal/theme/stylesheet.css
Add line:@import url("we_universal_custom.css");
- File: styles/we_universal/theme/stylesheet.css
- Set header background image:
- File: styles/we_universal/theme/we_universal_custom.css
.inventea-dashboard {
        background-image: url("images/background.jpg");
Location of image file: /srv/www/html/phpBB3/styles/we_universal/theme/images/
- File: styles/we_universal/theme/we_universal_custom.css
- To view changes online: GENERAL tab + Purge the cache + Run now
- Admin panel:
- Customize tab + Style Management/Install Styles + select style we_universal + Select button "Install style"
- General + Board Configuration/Board settings + Board style:
- Default style: we_universal
- Guest style: we_universal
- Override user style:yes
- "Submit"
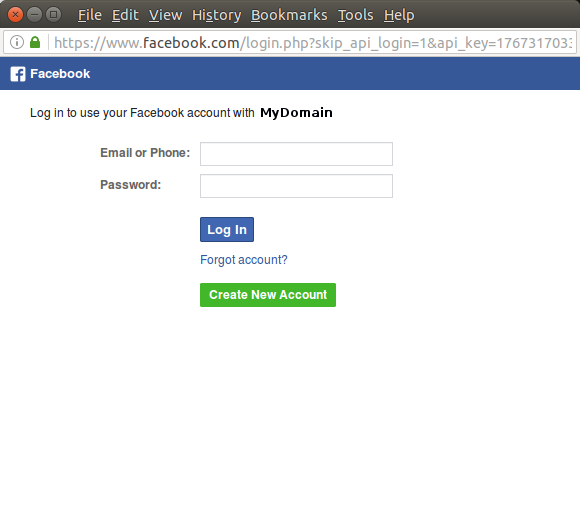
The social media plugin "OneAll" provides a convenience to users so that a single sign-on provides one login/password to remember and manage as well as to provide an effective facility to block spammers. The social media companies are getting better at determining if a user is real or fake, reducing your exposure to fake users who spam forums. The "OneAll" plugin gives you the option to use one or more social media single sign-on facilities. We will show the use of Facebook's single sign-on but this plug-in is not limited to Facebook.
Installation:wget http://public.oneallcdn.com/extensions/phpbb/3.1.x/phpbb-3.1.x---oneall_social_login-2.4.9.zip unzip phpbb-3.1.x---oneall_social_login-2.4.9.zip sudo mv oneall /srv/www/html/phpBB3/ext/ sudo chown -R apache.apache /srv/www/html/phpBB3/ext/
Registration:
- Sign up for a OneAll account: https://app.oneall.com/signup/
You will be assigned an Api endpoint (eg. https://mydomain.api.oneall.com), Public Key and Private Key - Register with Facebook: registration is via the oneall.com web site - leave the "Namespace" field empty.
- Register with other social media sites
Configuration:
- Go to Admin panel and select the "CUSTOMIZE" tab.
- Select the "Enable" link for the "OneAll Social Login" extension.
- Purge the cache
- Select the Admin "EXTENSIONS" tab and follow the OneAll instructions. Their step-by-step instructions are so good, I can't do better.
- Open firewall: OneAll communicates via HTTPS on port 443

Note that older methods of installing PhpBB modules using AutoMOD has been deprecated. AutoMOD is a tool designed to parse and automatically install MODX MODifications for phpBB AutoMOD is incompatible with phpBB 3.1.x and attempts to install and use it could result in board failures. phpBB 3.1.x has its own way of handling extensions and a tool like AutoMOD is no longer needed.
If you try and install and use automod it will give the following error when you try and login: "Tried to redirect to potentially insecure url."
In order to backup everything (structure and data) go to: ACP + MAINTENANCE tab + DATABASE / Backup + select Full menu button and "Select all" link to select all tables.
This will generate a backup file: /srv/www/html/phpBB3/store/backup_1589698436_75d5f456f9e45627.sql.gz
Note that uploaded images and attachments will end up in /srv/www/html/phpBB3/files/
